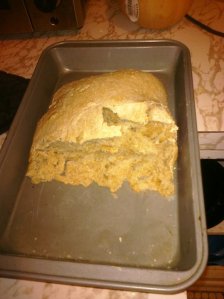
Almost a year ago, back in September of ’09, I did one of those things where I make a noble, yet somewhat ridiculous goal for myself and then torture myself trying to keep it. The goal this time around was to remove all preservatives and artificial ingredients from my diet, meaning that I was essentially making everything I ate from scratch. Like I said, noble.
During that period I was making this bread at least once a week. I’ve since calmed down a lot. However, this bread still makes frequent appearances in my kitchen. The best thing about this bread is that it’s so easy. Seriously. I was always under the assumption that making bread required a deft hand and a good amount natural talent, but this simply is not the case. Also, aside from the fact that you have to start it early in the day in order for it to be ready to go by dinner, it takes very little time out of your day to day activity. In fact, I once started this bread, forgot about it, came home around 10 pm to find it had risen to gargantuan heights, popped it in the oven, and it still came out perfect. I dare you to mess this up.
More raving: I love this bread fresh out of the oven with a little butter, but it also works great for French toast, toasted with garlic and served under a pile of beans and roasted tomatoes for a quick weeknight meal, AND when it finally gets down to that stale end-of-loaf stage, it works great in meatballs.
No Fuss Bread
*adapted, loosely, from Deb at smittenkitchen.com
Ingredients
*3 cups flour (I use two cups of all-purpose and one cup of stone ground wheat. You could really do any variation.)
* 1 heaping tsp of salt
* 1/2 tsp sugar
*1/2 tsp yeast
* 1 1/2 cups water (the original recipe called for milk, but the first time I made this bread I didn’t have any on hand so I substituted water and quite liked how it turned out. Also, now it’s vegan!)
In a large bowl mix the flour, salt, and sugar together. Activate yeast and add to the bowl along with the water. Sprinkle your counter with a dusting of flour and knead well. Then roll your dough in the flour to give a nice even coating, put in a warm bowl and leave alone.
Awhile later (two hours should do it), punch dough down, knead some more, then stick it back in the bowl and leave it alone again.
Later (Two more hours? Three? Doesn’t matter), punch the dough down and give it one last knead. Shape the dough into a baguette. Slash four diagonal cuts across the top and brush the entire top of the loaf with water. Bake at 450 degrees for about 30 minutes.
*My apologies for not having any pictures accompanying this post. I actually haven’t made this bread in awhile and therefore don’t have any pictures on-hand of the process or the finished product, but I was inspired to start this blog today and was anxious to get it up an running. Rest assured, there will be pictures aplenty in the posts that follow.
